I have a habit of looking at any container that could fit on the back of my kayak and figuring out if it would make a good bait tank. Well Jackson Kayak made an awesome container called the JKrate to fit on the back of their kayaks and the guys at OEX Kayaks in San Diego helped me turn it into an awesome bait tank.

Turn This plain JKrate
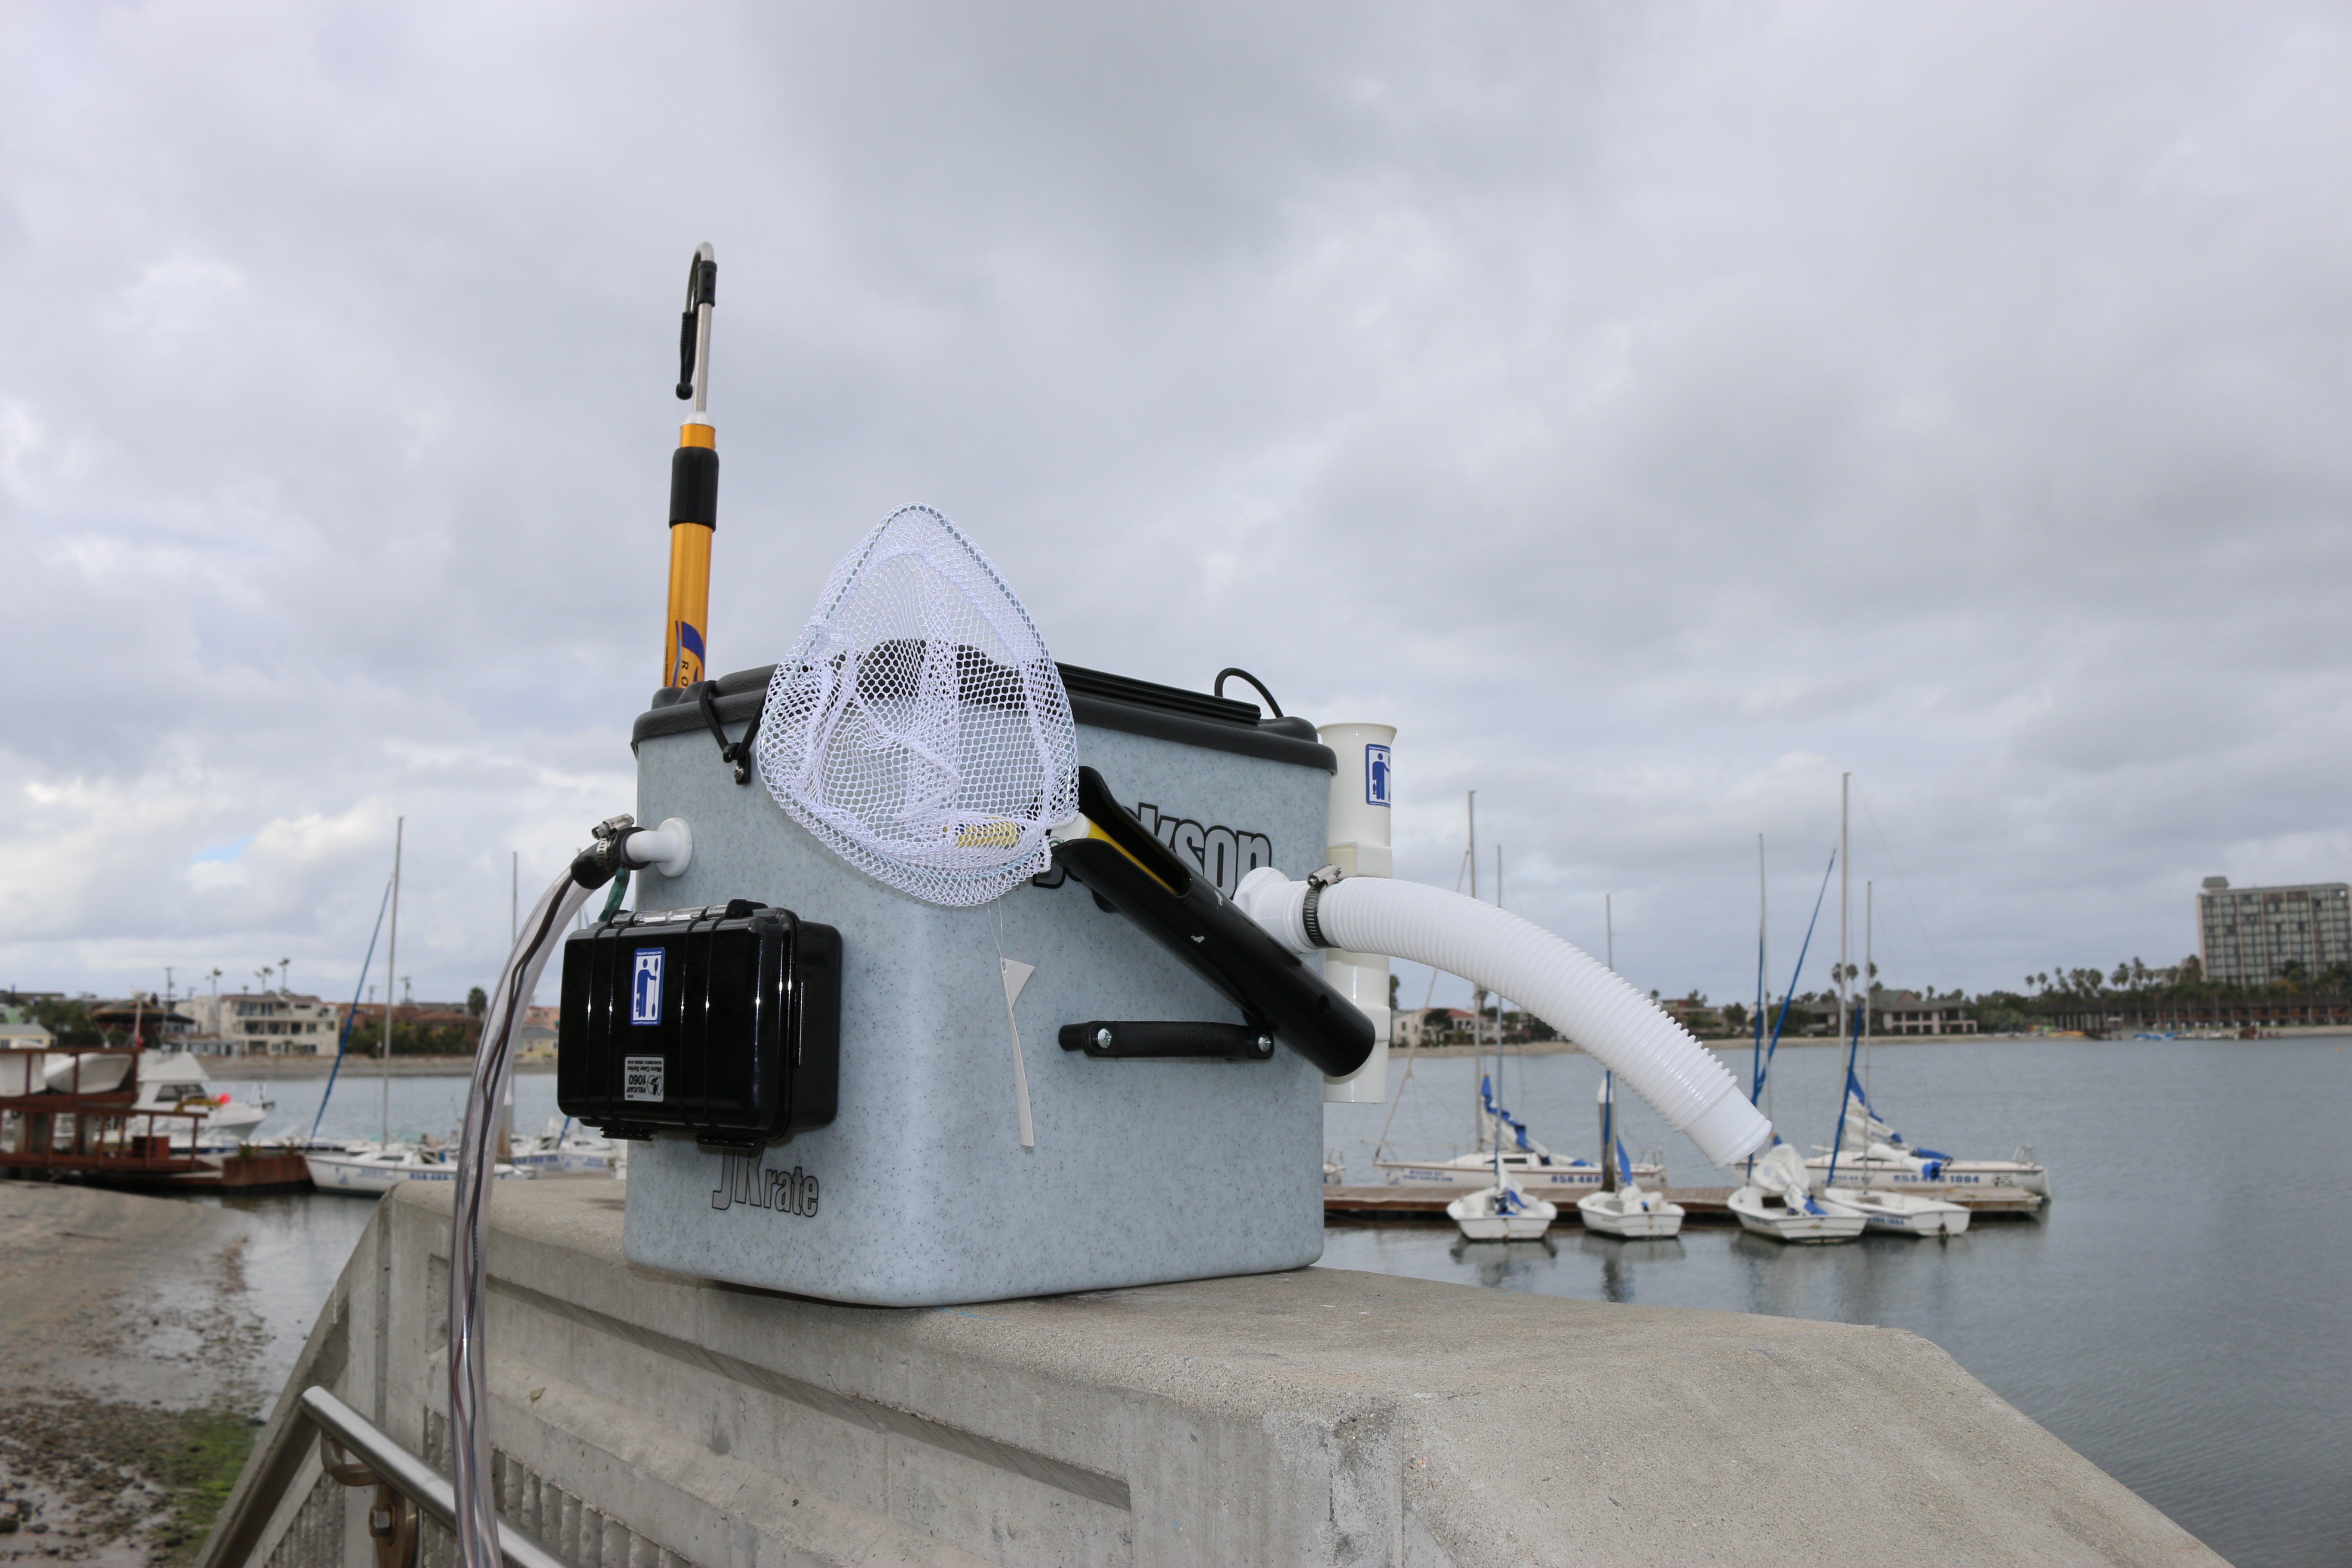
Into this Awesome Bait tank

With these parts
The first step is placing the Jkrate in the back of the intended kayak and figure out the orientation that you will need to use.
Once that if figured you may need to remove the side handles and relocate to the other sides, this is easy as the JKrate has inserts in the plastic to screw into.

Simple task of moving the handle
The next step for me was to rearrange the bungee that secures the lid, when new there is a lot of excess bungee that allows the lid to come a long way off, I wanted to keep the lid tighter. So a couple loops on one end and another on the other side to hold it down and it was done.

loose bungee

bungee redo
The next step was to add the three position rod holder to the back, I like them so the top of the rod holder is just above the lid, you also need to make sure that the holes don’t hit the inserts in the tank.
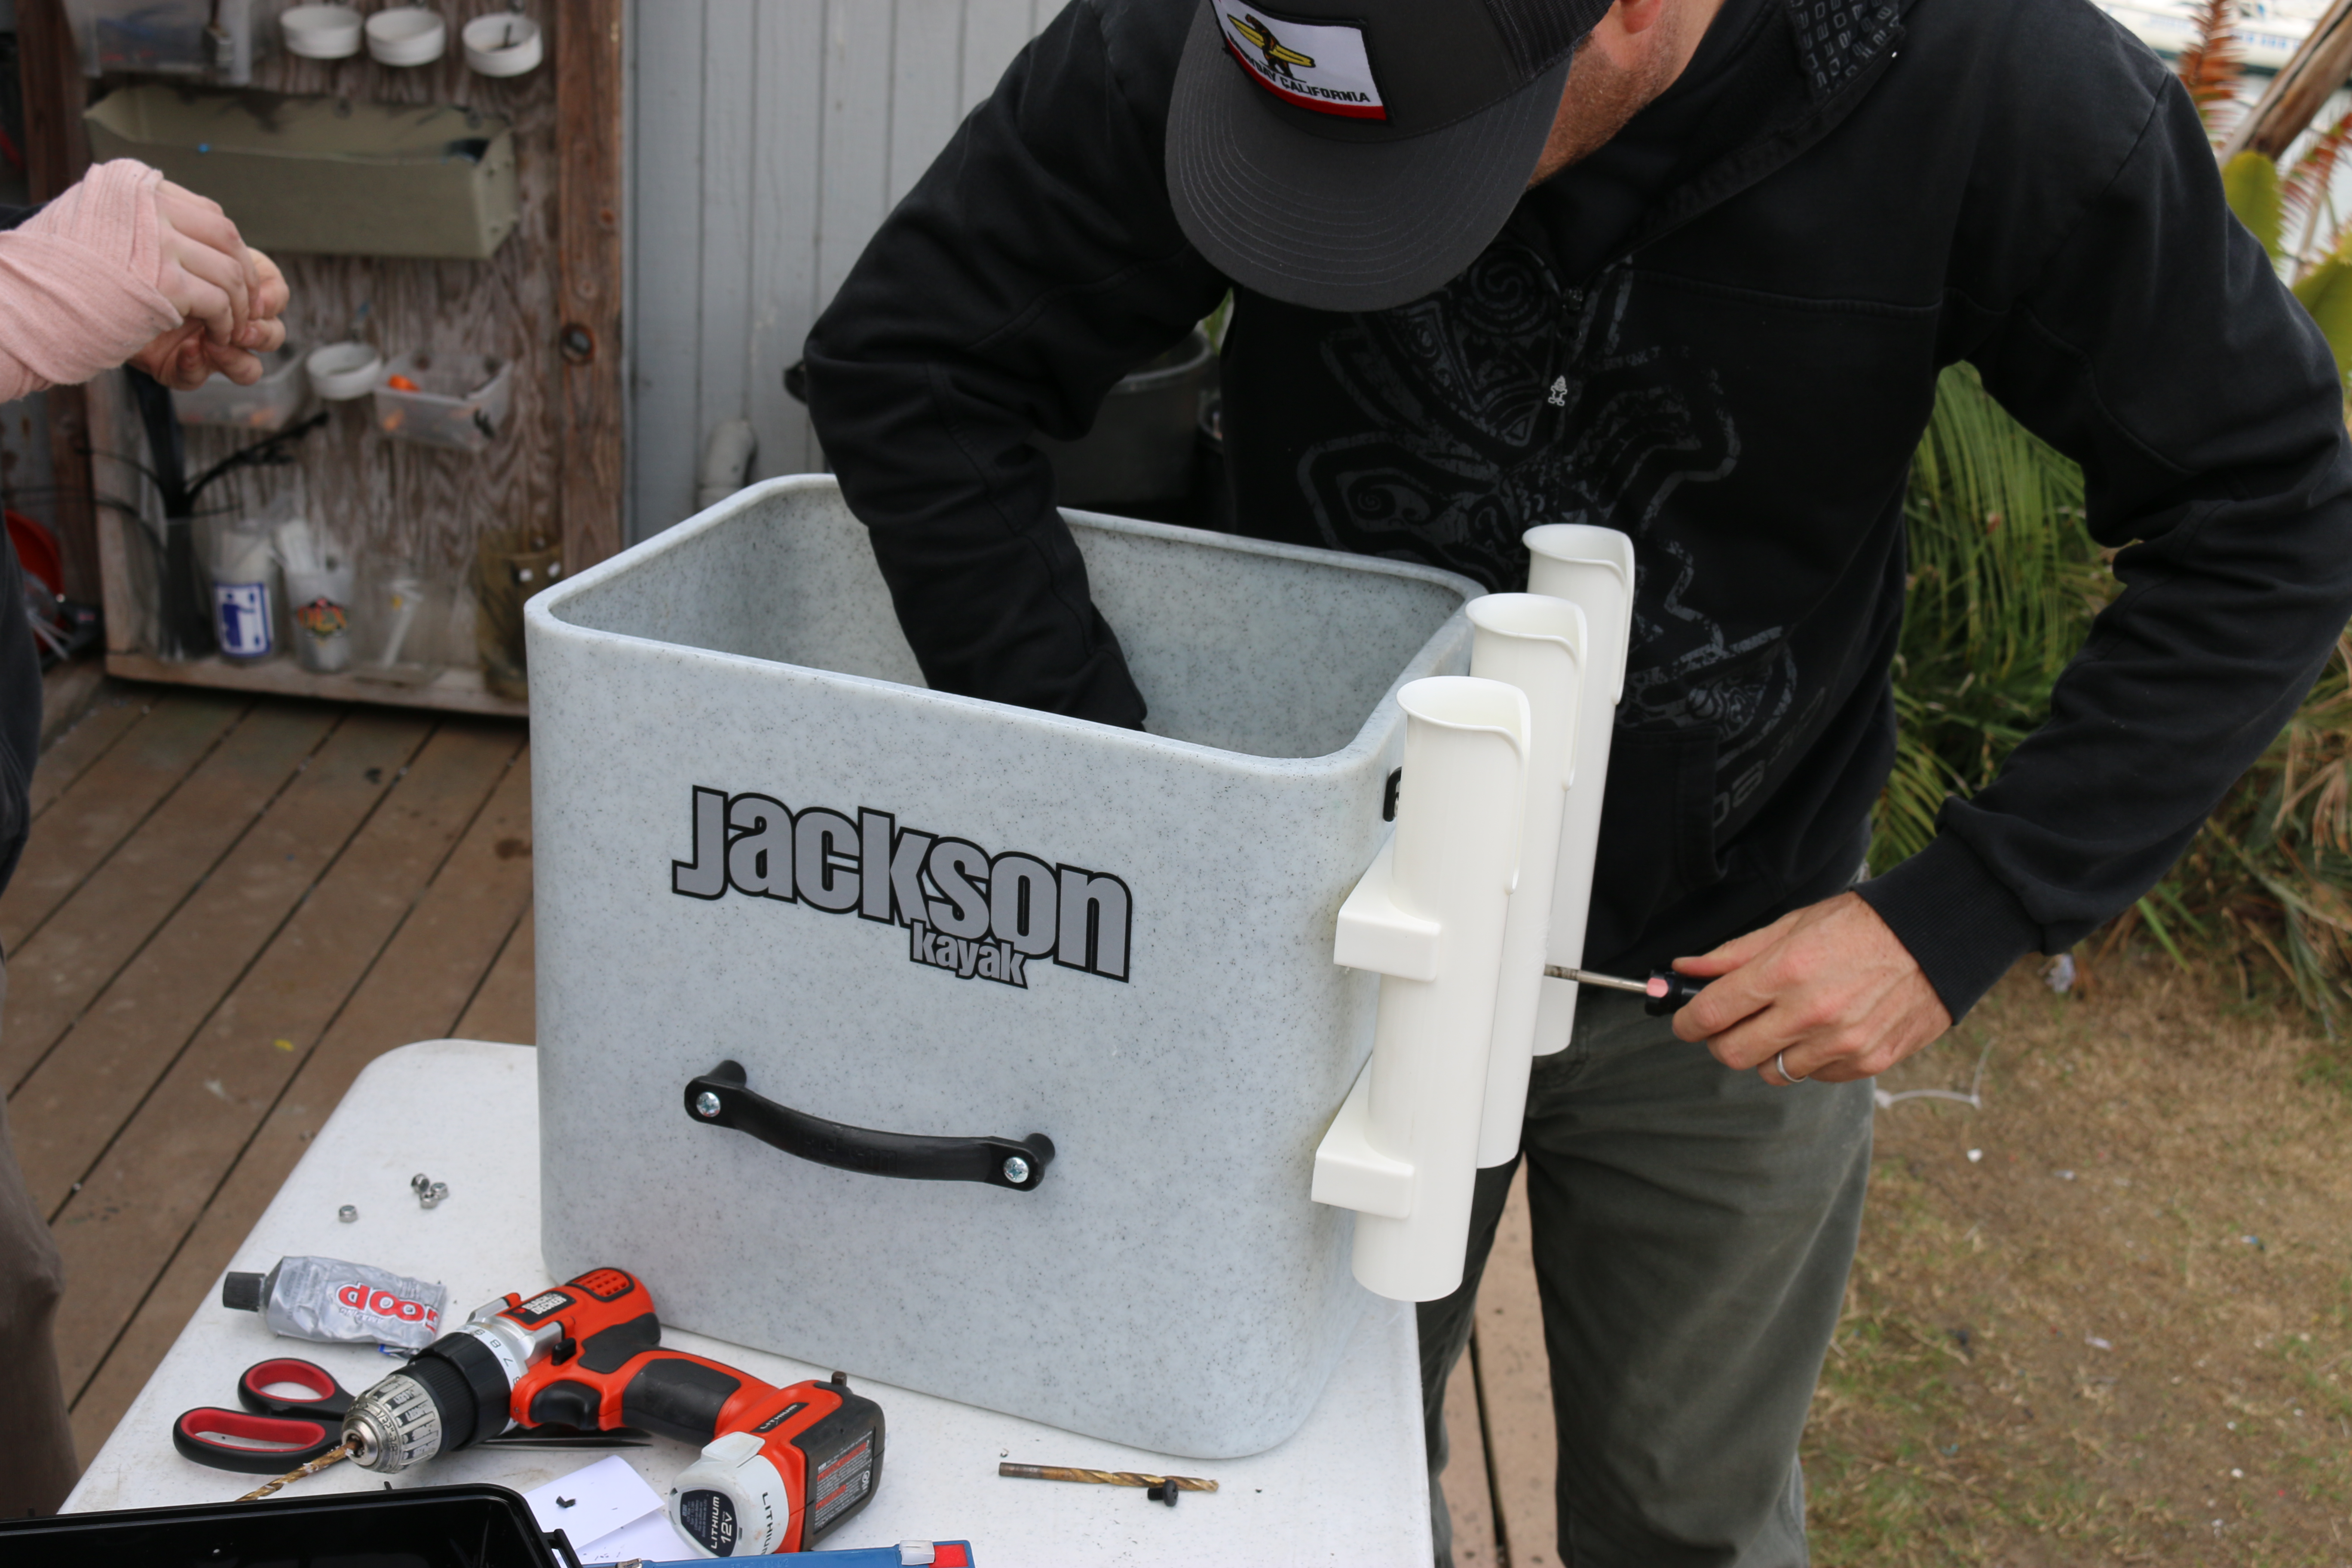
adding the rear rod holders
Next we attached the small Pelican case which will hold the 6v 12amp battery and the power switch. Before attaching to the JKrate you will need to drill it out for the waterproof switch, and waterproof wire connector. You will also drill two holes to match the inserts in the tank as that is what you will you to attach the case to the tank.

Switch and wire connector.

attaching case to tank
You will need to drill three larger holes in the tank next, one for the adjustable spray head, one for the upper overflow and one for the drain. The height of the overflow will determine the amount of water you carry so you can put it as high or low as you wish, depending how much weight you want to carry or the size of your bait.

mounting the adjustable spray head

inside look at the adjustable spray head

overflow mounted on side with added hose.
Now we attach the hose and bilge pump, I like to run the wires for the pump up inside the hose this has a much cleaner look and avoids the use of zip ties.

a look at the pump

See the wires inside the hose

some shrink tubing and goop where the wire comes out of the hose. And wire connectors with shrink fitting as well
Run your wires from the switch through the water tight connector and hook it up and you are almost done.
I decided to add a couple more single rod holders to the sides of the tank, one for holding my gaff and one for holding a bait net.

Gaff holder

bait net holder
Here is a look at how the battery fits in the Pelican case

Water tight Battery Box
Marine Goop was used on all connections and holes to keep things as water tight as possible.
The build took about an hour to complete.
And here you have a few shots of the finished product.

The JKrate is now a JTank

I can’t thank the guys at OEX Kayaks and Kayak Fishing Supplies enough for their help with this project.
Here is a list of the parts we used for the bait tank prodject, all of which are available at Kayak Fishing Supplies.
Power: 6 Volt 12 AMP battery
Case: Pelican 1060 solid waterproof case
Switch: Cole Herse waterproof toggle switch with boot cover
Pump: Rule 360GPH
Misc:
-Wire seal on Battery Box
-16G marine grade wire
-Adjustable aerator intake fitting
-1 1/2″ overflow strainer fitting
–3 rod rack system
-2 single stage rod holders
-polyethylene wrapped bungee
-3/4″ tubbing with SS hose clamp (2)
-1 1/12″ hose (1)
-SS nuts and bolts
– coleman cooler drain
